What is CPU?
It’s easy to get confused by the alphabet soup that is computer jargon. However, one of the most important things you should understand is what a CPU is, and what cores do in a CPU. Here’s everything you need to know about CPUs, including what CPU you have and how many cores your CPU has.
What Is A CPU?
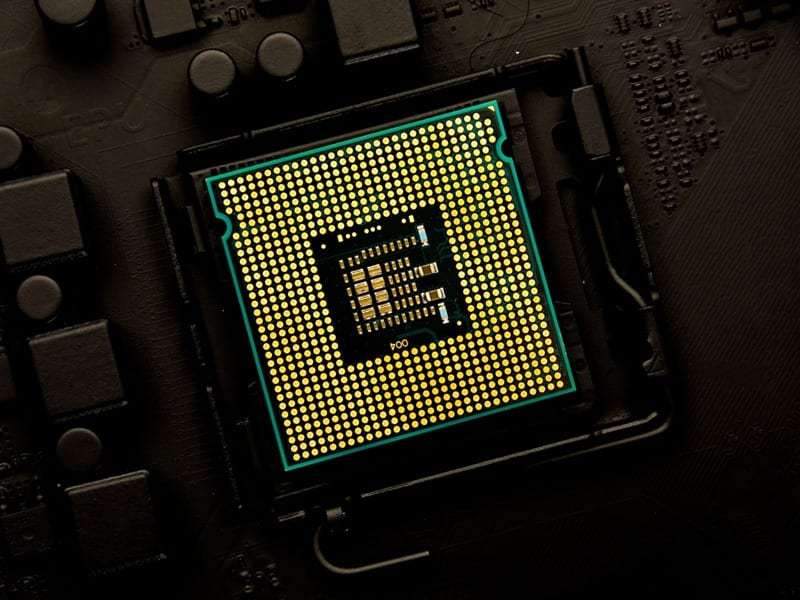
A CPU (which stands for central processing unit) is a small chip that is made of billions of microscopic transistors. It has two main components: the arithmetic logic unit (ALU) and the control unit (CU). The control unit is responsible for getting instructions from the main memory of your computer and decoding these instructions into commands.
On the other hand, the ALU executes these commands and stores it into the main memory. As its name suggests, it does arithmetic and logical operations. It performs mathematical operations like addition, subtraction, multiplication, and division. For logical operations, it compares values, which can be numbers, letters, or special characters.
What Does a CPU Do?
A CPU is often referred to as the brains of a computer. It is the part of your computer that receives instructions, performs calculations, and executes actions. Specifically, a CPU has four functions: to fetch, decode, execute, and store instructions.
First, it fetches instructions from your computer’s memory. Next, it decodes or translates these instructions into binary instructions (or a series of 1s and 0s) so the computer can understand the instructions. Finally, it executes these instructions and stores the output in its memory.
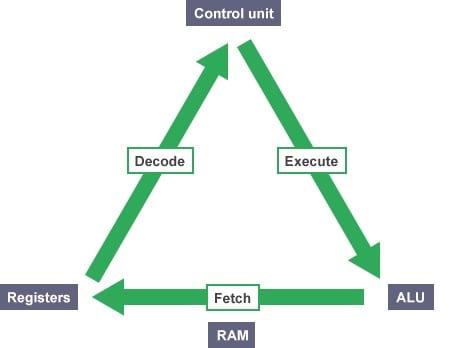
During this fetch-decode-execute cycle, your CPU will interact with other components, like the register and random-access memory (RAM). Now that you know what a CPU does, here’s how to find out what kind of CPU you have in your Windows 10 or Mac computer.

What CPU Do You Have?
How to Find Out What CPU You Have in Windows 10
- Open the Start Menu. You can do this by clicking the button in the bottom-left corner of your screen that is shaped like the Windows logo.
- Then click Settings. This is the gear-shaped icon just above the power icon.
- Next, click System.
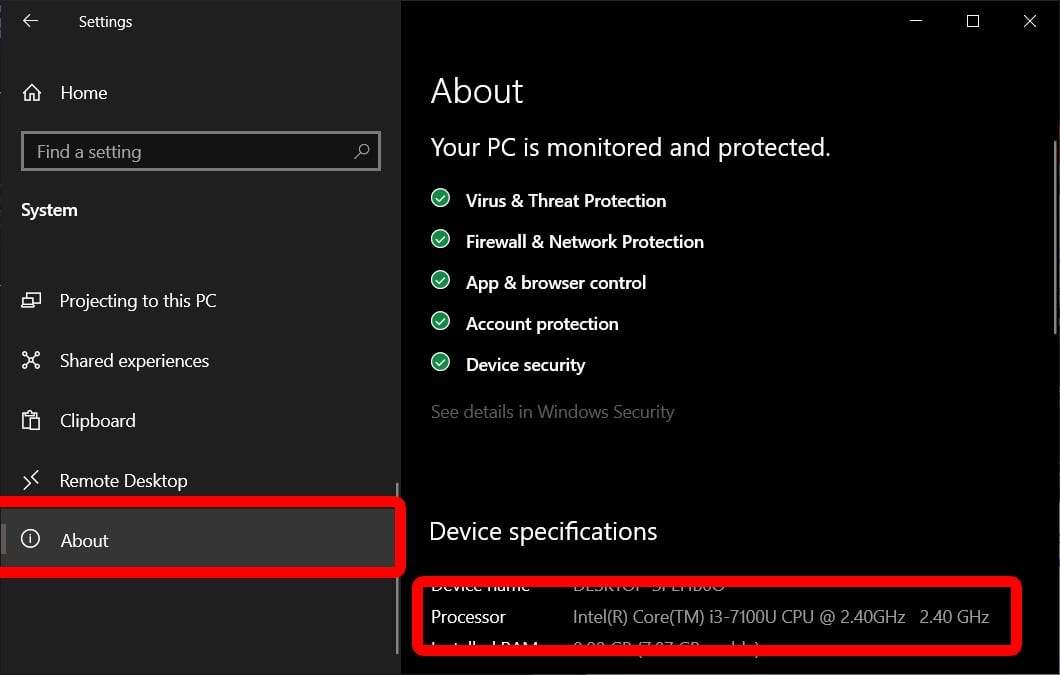
- Scroll down to About in the left sidebar.
- You will see your CPU’s name next to “processor” under “Device specifications.”
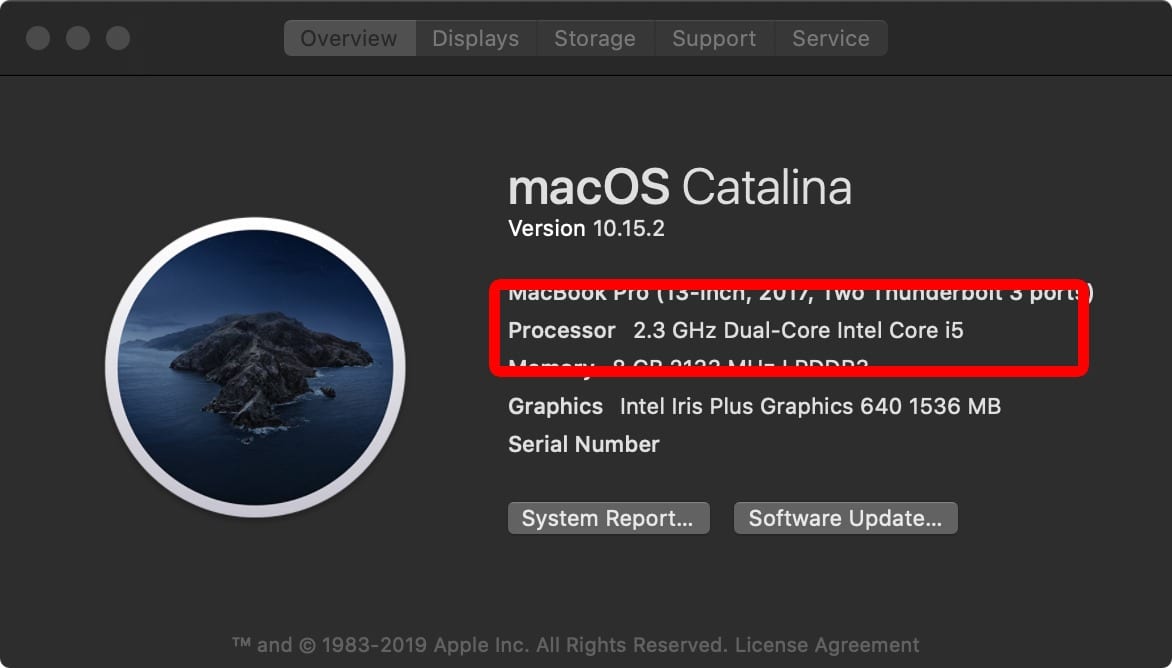
How to Find Out What CPU You Have on a Mac
- Click on the Apple logo in the top-left corner of the screen.
- Then click About This Mac.
- You will see your CPU’s name next to “Processor” in the Overview tab.
What Do Cores Do in a CPU?
Cores are units within a CPU that can run different processes. Each core of a CPU can work separately, or multiple cores can work together to complete tasks. Therefore, the more CPUs you have, the faster your computer will be.
Nowadays, it is quite common to see multicore processors. A dual-core CPU, for example, has two processing units in the CPU, quad-core has four units, a hexa-core has six, and so on. The highest number of cores supported in the market today is Intel Xeon 9200 Processor, which has a whopping 56 cores and 112 threads.
You can also physical and logical cores. While physical cores are hardware, logical cores are made up of codes within the computer that can process tasks or threads simultaneously. A thread is like a conveyor belt that brings data for each worker to process. So, if you have four physical cores and two threads per core, you would have a total of eight logical cores.
How Many Cores Does Your CPU Have?
You can easily see how many cores your CPU has from the System Information menu. In Windows, you also have the option to see this information from Task Manager, Device Manager, and WMIC. Another option for Apple users will be to see their computer data in the About This Mac screen.
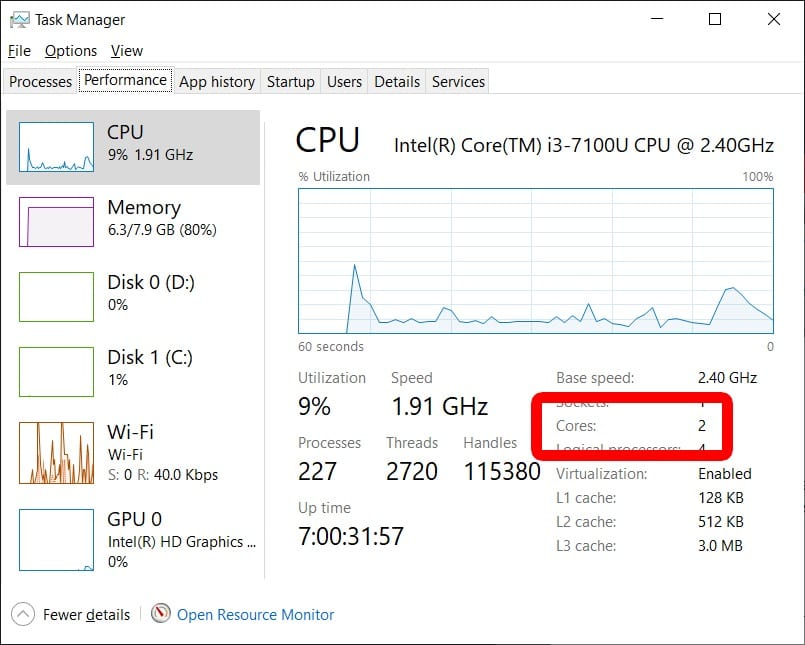
How to Find Out How Many Cores You Have in Windows 10
- Right-click on your taskbar. This is the bar on the bottom of your screen.
- Then click Task Manager.
- Go to the Performance tab. You will see this at the top of the window, to the right of the Processes tab.
- You will see how many cores you have next to Cores in the bottom-right corner. If you do not see this screen, make sure to hit the “More details” button in the bottom left corner of the window.
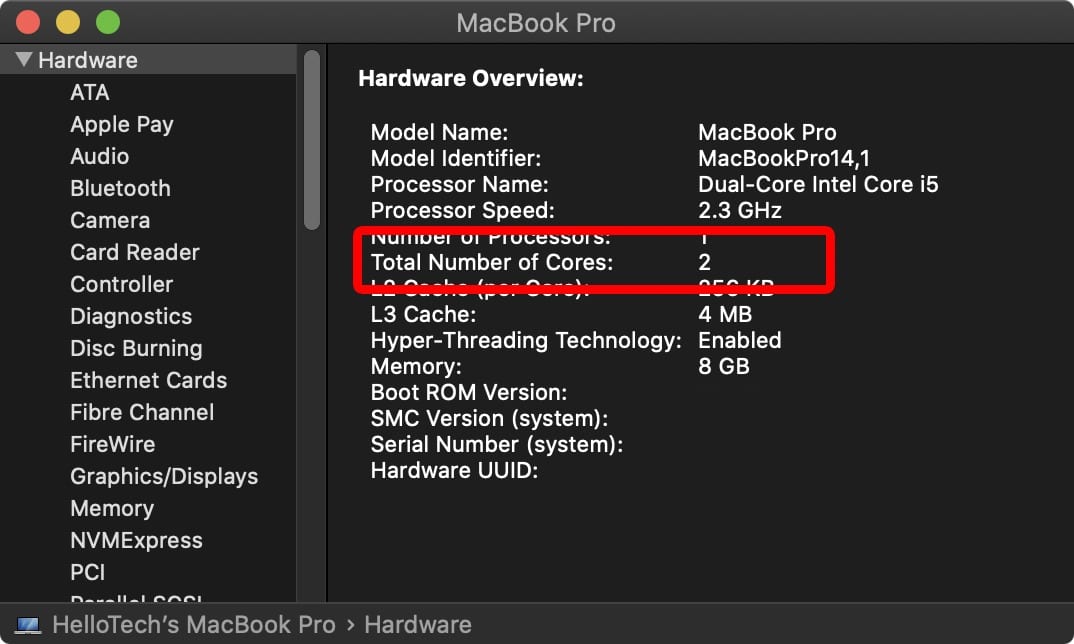
How to Find Out How Many Cores Your Have on a Mac
- Click on the Apple logo at the top left-hand side of the screen.
- Then click About This Mac.
- Next, click the System Report button at the bottom of the window.
- You will see how many cores you have in the pop-up window next to “Total Number of Cores.” If you don’t see this screen, make sure you are in the Hardware tab in the right sidebar.
If you want to know more about your computer’s CPU, check out our article on the difference between 32-bit and 64-bit processors.https://genexisvalte.blogspot.com/2020/07/difference-between-32-bit-65-bit.html?m=1